- Introducing Project Buford T Justice – Our 1987 9C1 Chevy Caprice – The Adventure Begins!
- Project Buford T Justice: Our Cop Car Cruises Home and Then We Beat on It!
- Driveway Tech: Bodywork on Buford T Justice – We Close Our Roof Hole For Fun and (NO) Profit!
- Project Buford T Justice Hits the Strip with Some Pretty Shocking Results!
- Project Buford T Justice Hits the Dyno and Goes KABLOOEY! CARNAGE VIDEO INSIDE!
- Project Buford T Justice Will Be Saved For About A 100 Bucks With a 15 Year Old Transmission
- Project Buford T Justice Update: The Trans Thrash is ON!
- Buford T Justice Update: It Lives Again Thanks to a Down and Dirty Driveway Thrash and Junkyard Parts
- Buford T Justice, Our 1987 9C1 Chevy Caprice Goes Through Final Testing Before the Upgrades Begin!
- Buford T Justice 9C1 Update: The Parts From Hotchkis, Cragar, AFCO, and Mickey Thompson
- Update: Hotchkis Suspension & AFCO Bushings Transform Our 9C1 Caprice
- Buford Update: Our 9C1 Caprice Gets Real With Mickey Thompson Tires and Cragar Wheels
- Driveway Tech: How To Swap A Jeep Steering Shaft Into Your GM B-Body or G-Body Car With A Trashed Rag Joint
- Buford Update: We Flog The Suspension, Unveil a Mountain of Speed Parts, Spill Our Wild Drag Strip Plan
- Project Buford T Justice Update: Drag Strip Thrash Squashed By Ma Nature – We Learn Stuff – Plan B!
- Project Buford T Justice Quick Update: Where The Hell Has Our 9C1 Caprice Been?!
- Project Buford T Justice: We Go On Hot Pursuit Of Horsepower-Our 9C1 Caprice’s 350 Gets A Slap!
- Buford T Justice 9C1 Caprice Update: Metal Fab,Head Work, A Good Surprise, An Awful One
- Buford T Justice Update: Headers, Cheap LS Technology, New Valvetrain Parts, More Compression, Fun!
- Buford T Justice Update: A TCI 700R4 And Breakaway Torque Converter Get Our 9C1 Caprice Shifty!
- Buford T Justice Update: A Very Frustrating Day On The Dyno And How We’re Planning To Fix It
- Project Buford T Justice Update: Where Has Our 9C1 Caprice Been Hiding?
- Buford T Justice Update: We Install A First Gen Chevelle Flowmaster Kit On Our 9C1 Caprice!
- Project Buford T Justice: Our Caprice 9C1 Gets The Shaft! A Dynotech Drive Shaft That Is!
- Project Buford T Justice Our 1987 9C1 Caprice Hits The SCCA Autocross – Photos And Video!
- Project Buford T Justice Update: We Finally Give Our 1987 9C1 Caprice A Cheapo Nose Job!
- Project Buford T Justice Update: We Hit The Strip Again With More Power! (W/Video)
- Buford T Justice Update: We Bolt On Power From Trick Flow And Snappy Looks From Trans Dapt!
- Project Buford T Justice Update: Where The Heck It’s Been And Where The Hell It is Going –
- Place Your Bets For A BangShift Shirt! Buford T Justice Is Hitting The Dyno With This Engine One Last Time – Guess The Power And Win
- Project Buford T Justice: The Long Arm Of The Law Gets Longer With A Stroker Build – 388ci Of Budget Fun
Few jobs will give you the self-satisfaction of repairing the outside of your hot rod, project, or racer. Yes, screwing together a fire breathing engine will give you levels of joy that will make you want to crush Busch Light cans on your face, but making the thing look better by mending sheet metal is even better than that. That being said, lots of guys have an irrational fear of even trying the most basic of repairs in their own driveway. Thankfully for me, my complete and utter poor-ness keeps those fears at bay. As a result, I spent a nice Saturday afternoon cutting, grinding, and fusing metal with electricity (welding) in my driveway. The results left my neighbors gawking at the scene, my kids thinking I was a wizard-like sorcerer who wore a scary mask, and my wife shaking her head in what I believed to be stunned approval (but which actually may have been sullen acceptance of the whole situation…your guess is as good as mine).
To set the scene, Buford T Justice, my soon to be big block Chevy powered 1987 Caprice had a decent sized hole in the roof from its former life as a police car. This must have been the hole made to run the wires to whatever lights were mounted on the roof when it was chasing bad guys and keeping the streets of PA safe from crime. The hole was a small problem because it served as a high speed entry point for creepy crawly things as well as whatever elements that mother nature threw at me here in New England. It also had a weirdly harmonic whistle at about 100mph, but that is another story for another day. Short story long, I needed to close that thing up. The moral here is that if my ham-fisted ass can do this, you can to and quit the whole being ‘fraid of trying. Just do it!
From here on out, the stunning photos and captions will tell the tale!
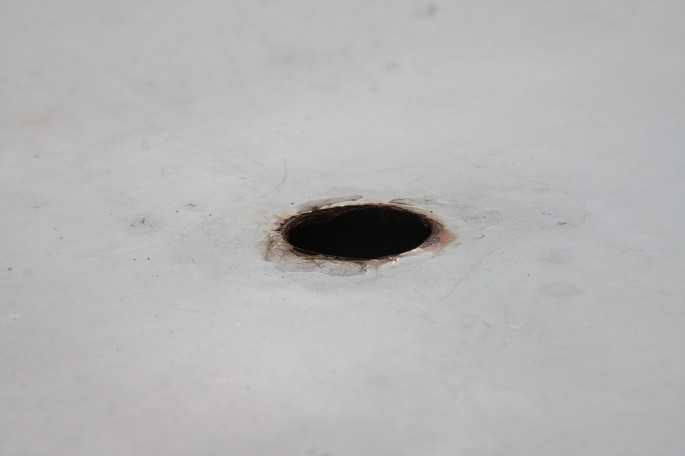
Here 's the problem. This hole was keeping me up at night. Why? Stuff would crawl in here and I would have to put tape over it before rain storms. That's ghetto even by BangShift standards.

I started out with a sheet of scrap paper and used it to make a paper template of the hole using a ball point pen. I went around the outside of the hole because cutting down metal is easier than stretching it. I have found the latter virtually impossible without neat shop tools.

I then sourced this scrap of sheet metal from my basement. Chances are you have some of this in your basement or shop. If not, your wife has cookie sheets and baking pans. DO NOT let her find any evidence of you cutting one up. This can end badly. I know from experience.
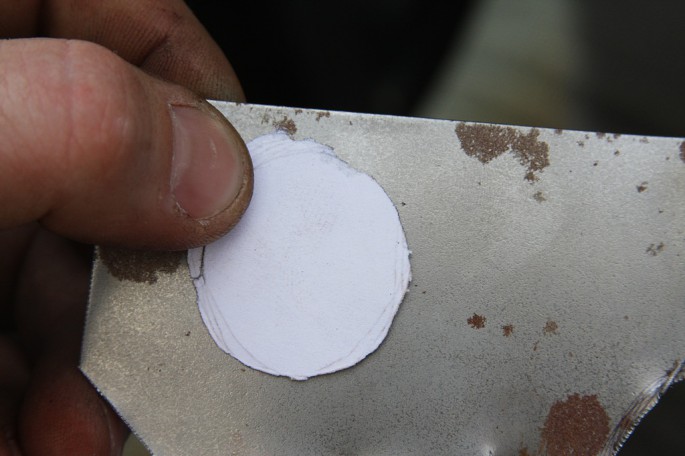
Next, I laid my paper template onto the steel. Stuff like this is gearhead arts and crafts. Don't fear it, just slip back into third grade mode and get it done. Beer may or may not help in small quantities.

This precision outline of the paper template gave me a basic shape to work with. I then went to a tool only skilled craftsmen use.
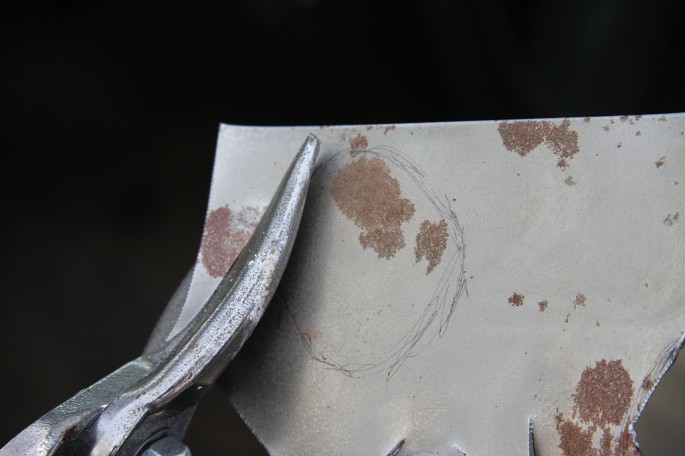
Tin snips! What did I tell you. This is gearhead arts and crafts. I cut to the "strong" side of my lines because again, you want to leave some excess to trim off rather than cut too much and have to start anew.

Here's my plug for the hole in the roof. Ladies, please note the wedding ring. So many e-mails asking about that. So now that we have a plug, how do we position it in the hole and trim it to fit?

A magnet. Magnets are your friend when welding. There are some really bitchin' ones that chassis guys use. This is just a garden variety model I snagged off of the fridge. The U-shaped design made it perfect for my application, as you will see in the next photo.
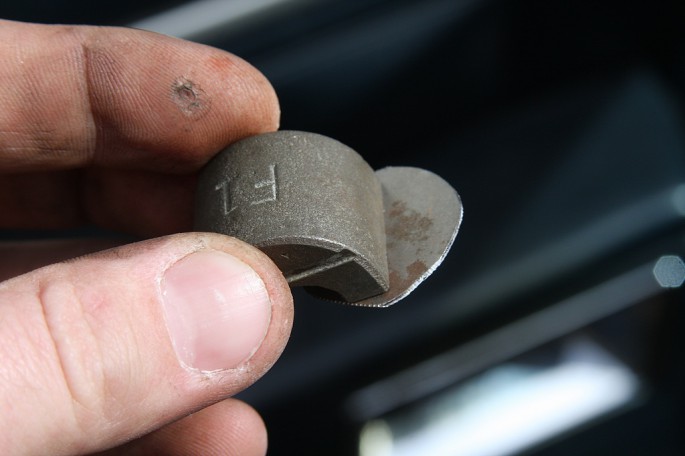
Here's why the design works for me here. One leg of the U will cling to the roof and the other leg will hold my plug in the hole at the correct depth, in theory.
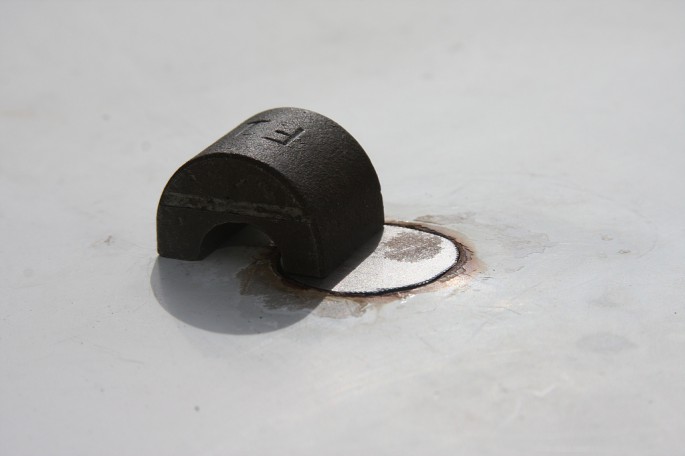
Boom goes the theory dynamite! It worked as I hoped it would. As you will note in this photo, I have some trimming and fitting to do. A couple of small snips here and there got me to the promise land. Remember, take your time and take small bites off of what you are trimming. Don't be the "I cut it three times and this is still too small," guy.

Because I was taking the piece in and out a lot to fit it, I made a reference mark to make sure I was putting it back in the same way each time. This saved me from cutting too much off or removing material from the wrong area.

When the fit was good, I busted out ol' mr. grinder to clean off the paint around the area I would be welding on. Yeah, that is a wet paper towel in there to catch any sparks that wanted to ignite the interior of the car.

With my roof plug trimmed to fit and my magical magnet in place, I slapped the helmet on, waved to my elderly female neighbor with one finger extended and went to town with the metal glue gun!
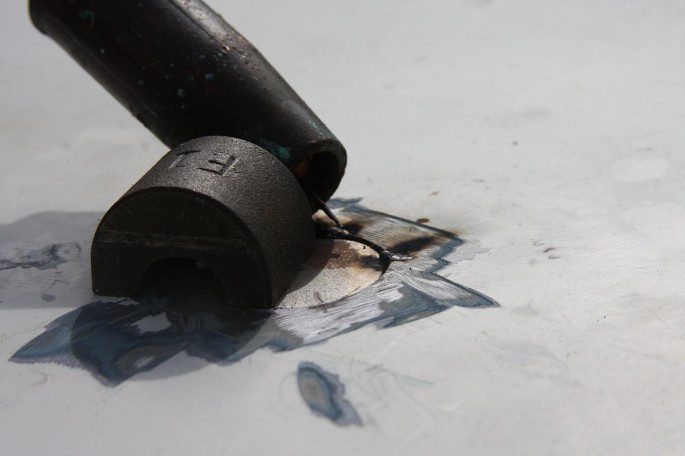
Ready....FIRE....AIM! Note that the plug is no longer level with the rest of the roof in this photo. That's my amateur mistake. I had the settings wrong on my crappy welder and with a high wire speed and incorrect heat selected, the wire rammed into the plug and drove it down before making a booger on it. I popped it out, adjusted my heat setting and slowed the wire speed way down, fixing this issue. Mistakes are part of learning. Don't be ashamed, embarrassed, or pissed about it. Learn and move ahead (perhaps have another beer to ease the pain!)
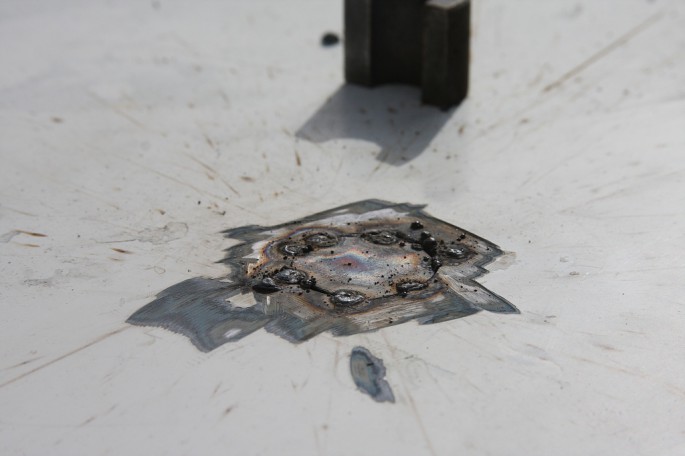
By making short bursts around different parts of the plug I tried to keep the heat as even as possible to avoid warping. There are some good welds, some boogers, and some junk in there, but I decided to grind down what I had to see how well I really did.

Overall, not too bad for a hack, but it is clear I had more work to do. See the area up top that is showing a gap and some of the other little holes? The greatness of metal work is that you can get right back at it and fill the areas you missed. Weld and grind!
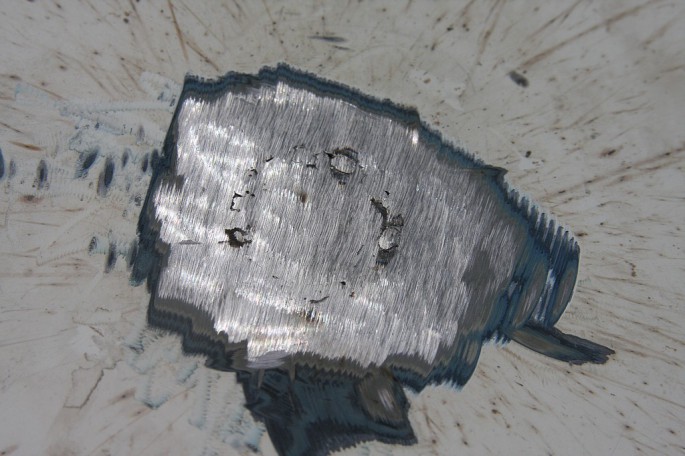
A few more welds, a little more grinding and I was pretty happy with what I was looking at. As a bonus, I had not set my car on fire yet! Talk about living right!
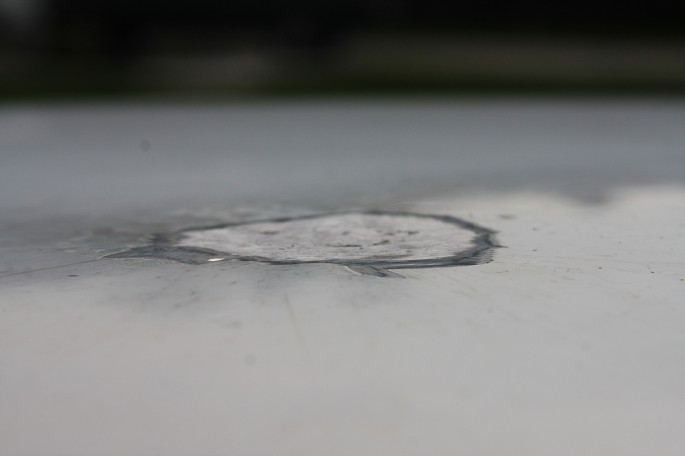
I think I did a decent job of not warping anything, either. The patch is pretty close to dead nuts even with the sheet metal of the original roof around it.
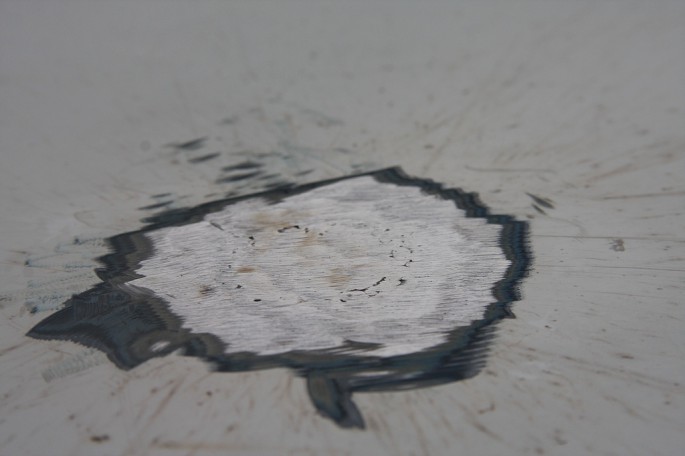
The final step would be to skim coat this with some filler to make it 100% even with the existing primer and paint. Unfortunately, my driveway zen session was ended when my two sons were trying to set one another ablaze or at least that's what it sounded like. So....

I snarfed the whole area with primer until I have a chance to do the filler and white paint. The primer will keep stuff from rusting for the time being. When it comes time to paint, I can sand it off before skimming with filler and spray bombing the roof to completely hide my handiwork. I am certainly not a professional body person and there are probably dozens of them barfing into a bucket while reading this. The point is not to be at the level of rare Ferrari restorations, but rather to fix your own car yourself and quit being afraid to tackle simply body work at home. You can do it...and probably better than me!
- Introducing Project Buford T Justice – Our 1987 9C1 Chevy Caprice – The Adventure Begins!
- Project Buford T Justice: Our Cop Car Cruises Home and Then We Beat on It!
- Driveway Tech: Bodywork on Buford T Justice – We Close Our Roof Hole For Fun and (NO) Profit!
- Project Buford T Justice Hits the Strip with Some Pretty Shocking Results!
- Project Buford T Justice Hits the Dyno and Goes KABLOOEY! CARNAGE VIDEO INSIDE!
- Project Buford T Justice Will Be Saved For About A 100 Bucks With a 15 Year Old Transmission
- Project Buford T Justice Update: The Trans Thrash is ON!
- Buford T Justice Update: It Lives Again Thanks to a Down and Dirty Driveway Thrash and Junkyard Parts
- Buford T Justice, Our 1987 9C1 Chevy Caprice Goes Through Final Testing Before the Upgrades Begin!
- Buford T Justice 9C1 Update: The Parts From Hotchkis, Cragar, AFCO, and Mickey Thompson
- Update: Hotchkis Suspension & AFCO Bushings Transform Our 9C1 Caprice
- Buford Update: Our 9C1 Caprice Gets Real With Mickey Thompson Tires and Cragar Wheels
- Driveway Tech: How To Swap A Jeep Steering Shaft Into Your GM B-Body or G-Body Car With A Trashed Rag Joint
- Buford Update: We Flog The Suspension, Unveil a Mountain of Speed Parts, Spill Our Wild Drag Strip Plan
- Project Buford T Justice Update: Drag Strip Thrash Squashed By Ma Nature – We Learn Stuff – Plan B!
- Project Buford T Justice Quick Update: Where The Hell Has Our 9C1 Caprice Been?!
- Project Buford T Justice: We Go On Hot Pursuit Of Horsepower-Our 9C1 Caprice’s 350 Gets A Slap!
- Buford T Justice 9C1 Caprice Update: Metal Fab,Head Work, A Good Surprise, An Awful One
- Buford T Justice Update: Headers, Cheap LS Technology, New Valvetrain Parts, More Compression, Fun!
- Buford T Justice Update: A TCI 700R4 And Breakaway Torque Converter Get Our 9C1 Caprice Shifty!
- Buford T Justice Update: A Very Frustrating Day On The Dyno And How We’re Planning To Fix It
- Project Buford T Justice Update: Where Has Our 9C1 Caprice Been Hiding?
- Buford T Justice Update: We Install A First Gen Chevelle Flowmaster Kit On Our 9C1 Caprice!
- Project Buford T Justice: Our Caprice 9C1 Gets The Shaft! A Dynotech Drive Shaft That Is!
- Project Buford T Justice Our 1987 9C1 Caprice Hits The SCCA Autocross – Photos And Video!
- Project Buford T Justice Update: We Finally Give Our 1987 9C1 Caprice A Cheapo Nose Job!
- Project Buford T Justice Update: We Hit The Strip Again With More Power! (W/Video)
- Buford T Justice Update: We Bolt On Power From Trick Flow And Snappy Looks From Trans Dapt!
- Project Buford T Justice Update: Where The Heck It’s Been And Where The Hell It is Going –
- Place Your Bets For A BangShift Shirt! Buford T Justice Is Hitting The Dyno With This Engine One Last Time – Guess The Power And Win
- Project Buford T Justice: The Long Arm Of The Law Gets Longer With A Stroker Build – 388ci Of Budget Fun


HEY! I offered to sell you a proper size roof hole sealing component for $300 ! Your cheap A$$ said that was too much for a plastic capplug !
On a side note…I have found spare Keys to Buford, that Im gonna use to liberate him when the Big block transformation is over !
Getting a manicure is good for you Brian. Man-I-Cure. See not so gay sounding?
for someone who doesnt do jack squat and is a keyboard commando, you sure do have some chewed up hands LOL
Brian,do you know you have a hole in your finger? Good job there.
Brian, try to keep your fingers back away from the grinder wheel just a little farther! LOL
Some leftover white house paint, a clean roller and that top’ll be looking like new. Barf…..
Brian, you forgot to add in the cost of therapy that your neighbors will need after watching this.
Probably the wife & kids too.
Hmmmmm, my brother in law has a grinder like that… by which I mean, no friggin guard…I’m used to using the back of my guard on my angle grinnder to apply a little pressure – when I borrowed idiot bro in law’s, tried the same thing without thinking…but its ok, I realised my mistake when my knuckles started disappearing…
Brian, just a question from somebody who does not know the right way of doing it: -Wouldn´t it be timesaving to take a holesaw, slightly larger than the hole, drill a perfect round new hole and then make a template out of that?
Must be easier to make a template if the hole is evenly round, or?
HEY! Quit making sense over there! If you keep that up, everyone will want to do it!
That a boy Brian , don’t be afraid to fail ! .
What’s with this fancy stuff? I did my first patch with an acetylene torch, a coat hanger, and some tin from a collapsed barn…. Tiger hair = WINNING.
Hey just a note, if you didn’t use Epoxy primer its gonna absorb moisture and rot from the inside out, Only epoxy primer is a sealer.. remember that. everything else is a sponge.